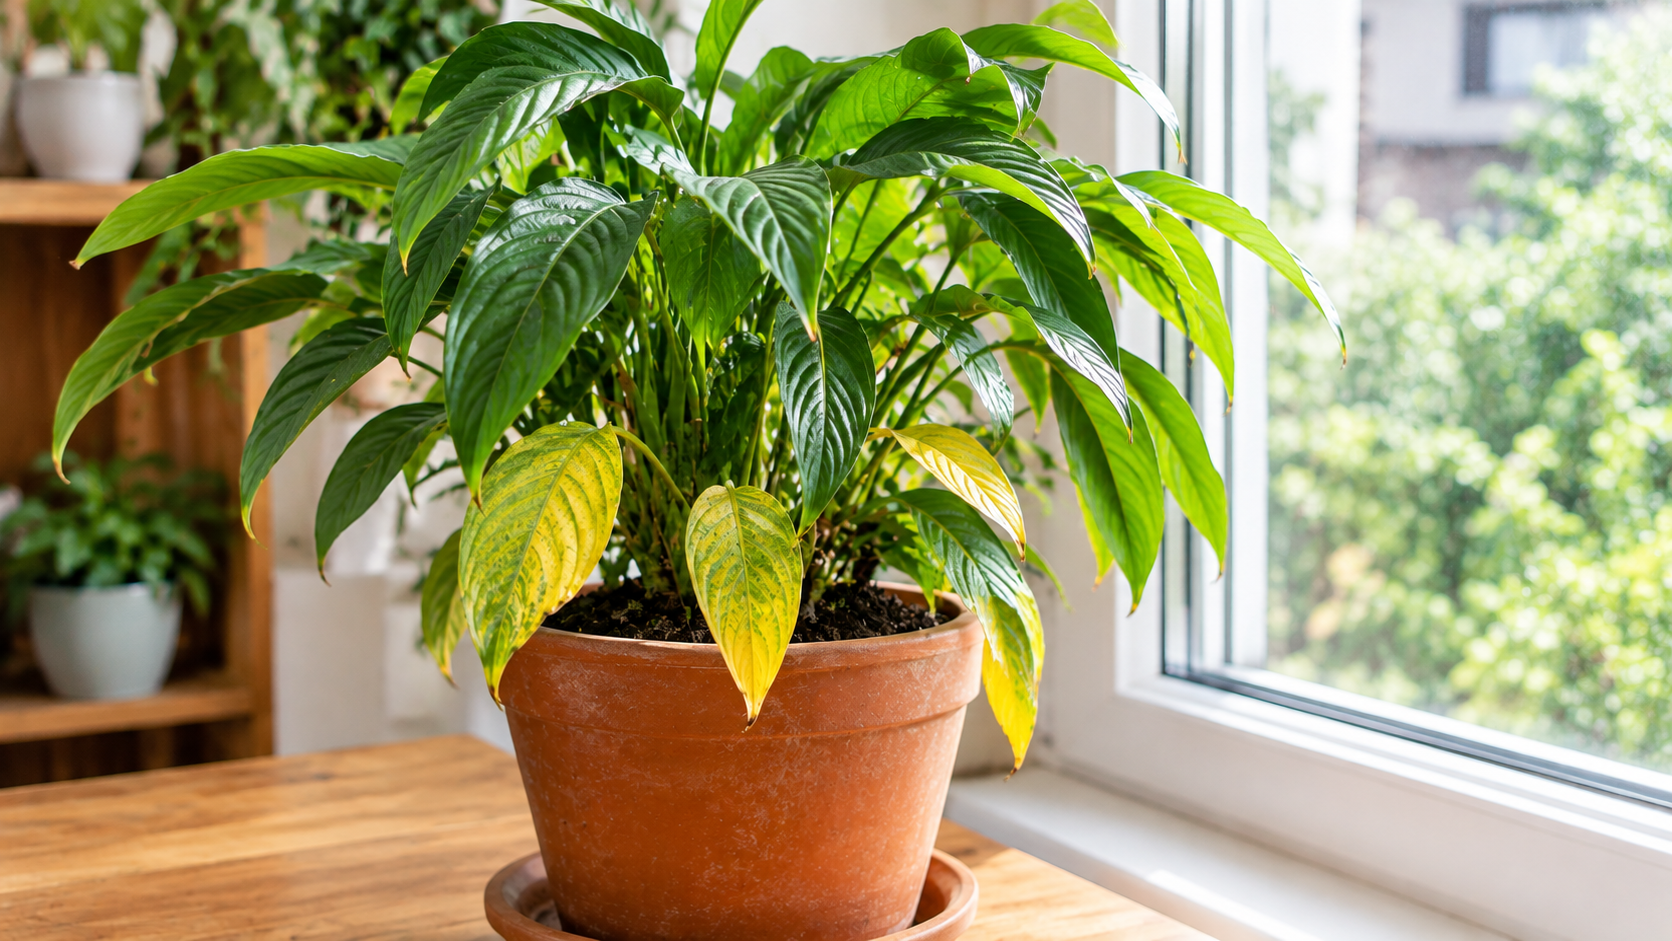
Yellow leaves can be frustrating, especially when a plant has been growing well for months and suddenly begins to look unhealthy. You might notice a few pale leaves near the bottom, yellow patches between the veins, or foliage that turns yellow and falls off within a short period.
Before changing your watering routine, adding fertilizer, or moving the plant to another location, take time to investigate the symptoms. Yellowing leaves can result from natural aging, watering mistakes, insufficient light, nutrient imbalances, damaged roots, temperature changes, or pests.
The challenge is that several of these problems produce similar symptoms. A wilted plant, for example, may need water, but it may also have damaged roots that cannot absorb moisture properly.
Understanding the pattern of yellowing and checking the plant’s growing conditions will help you make a more informed decision. Here is how to identify the most likely cause and choose an appropriate response.
1. Determine Whether Yellow Leaves Are a Normal Part of Growth
Not every yellow leaf signals a serious problem. Plants regularly replace older foliage as they grow, and some yellowing is a normal part of this process.
Start by examining which leaves are changing color. If one or two of the oldest leaves near the bottom turn yellow while the rest of the plant remains healthy, natural aging may be the explanation.
This is particularly common in mature houseplants that continue producing new leaves while gradually shedding older ones.
Look for these signs:
- Only a small number of older leaves are affected.
- New leaves appear healthy and maintain their normal color.
- The plant continues growing at its usual rate.
- Yellowing develops gradually rather than spreading rapidly.
For example, a mature foliage plant may lose an occasional lower leaf while producing healthy growth at the top. If the soil moisture, lighting, and overall condition are appropriate, there may be no need for major intervention.
However, if several leaves turn yellow simultaneously, including young leaves, or the plant begins dropping foliage rapidly, investigate further.
The distinction matters because unnecessary watering, fertilizing, and repotting can create additional stress in a plant that was otherwise healthy. The Royal Horticultural Society identifies natural aging, watering problems, insufficient light, and temperature changes among the possible explanations for yellow foliage.
RHS Advice
+1
2. Check for Overwatering Before Adding More Water
Overwatering is one of the most common causes of problems in indoor plants. It does not simply mean giving a plant too much water in a single watering session. More often, it means keeping the growing medium wet for too long.
Roots need both moisture and oxygen. When the soil remains saturated, air spaces become filled with water, limiting oxygen availability and potentially damaging the roots.
As root function declines, the plant may struggle to absorb water and nutrients, even though the soil feels wet.
Signs that overwatering may be responsible
Check for several symptoms together:
- The potting mix remains wet for an unusually long time.
- Lower leaves turn yellow and fall off.
- The plant wilts despite having moist soil.
- The base of the stems becomes soft.
- The pot has blocked drainage holes or no drainage holes.
- The roots appear mushy or have an unpleasant smell.
These signs are not definitive on their own, but they can help you decide what to investigate next.
How to check the soil
Insert your finger a few centimeters into the growing medium, or use a clean wooden stick to assess moisture below the surface. The appropriate depth depends on the size of the pot and the plant’s watering needs.
Do not water simply because the surface looks dry. The soil deeper in the container may still be wet.
If the mix is consistently saturated, allow it to approach the appropriate moisture level for that species before watering again. Make sure the drainage holes are unobstructed and empty any excess water from the saucer.
Cacti and succulents generally require different watering conditions from tropical foliage plants, so avoid applying the same routine to every species.
3. Recognize the Signs of Underwatering
Too little water can also cause yellow leaves. When the roots cannot supply enough moisture, the plant may reduce its foliage or allow older leaves to deteriorate.
Underwatering is more likely when the pot becomes very light, the soil is dry below the surface, and the leaves appear limp, curled, or crispy.
Consider these clues:
- The growing medium has pulled away from the pot’s edges.
- The soil is dry several centimeters below the surface.
- Leaves feel thinner, limp, or unusually brittle.
- Leaf edges become dry and brown.
- The plant improves after the root ball is properly rehydrated.
A common mistake is giving a very dry plant a small splash of water. This may moisten only the surface without reaching the roots.
When watering is needed, apply water slowly and evenly until the root zone is moistened and excess water drains through the bottom. If the potting mix has become water-repellent, several gradual applications may help it absorb moisture.
Afterward, empty the saucer and observe the plant.
Do not assume that every wilted plant needs water. If the soil is already wet, investigate drainage and root health instead.
4. Evaluate the Amount and Quality of Light
Light affects photosynthesis, growth, and the plant’s ability to maintain healthy foliage. When a plant receives less light than it needs, its growth may slow, its leaves may become pale, and older foliage may turn yellow.
This can happen when a plant is placed too far from a window, when nearby objects block daylight, or when seasonal changes reduce the available light.
Ask yourself:
- Has the plant recently been moved to a darker room?
- Is it positioned far from a natural light source?
- Have curtains or furniture reduced the available daylight?
- Does the species need bright indirect light or several hours of direct sun?
- Has the amount of daylight changed with the season?
Different plants have different light requirements. A shade-tolerant tropical plant and a sun-loving succulent should not automatically receive the same treatment.
How to improve light conditions
First, identify the species and check its preferred growing conditions. Then choose a location that provides an appropriate amount of light.
If the plant needs more brightness, move it gradually rather than immediately exposing it to strong direct sunlight. Leaves developed in lower light may be vulnerable to sudden increases in light intensity.
Excessive sunlight can also cause problems, including bleached patches, scorched areas, and yellowing.
Monitor the plant’s new growth over the following weeks. Existing yellow leaves may not regain their original color, so healthier new foliage is a more useful sign of improvement.
5. Investigate Drainage and Root Health
Sometimes the problem is not how often you water but how the container and growing medium handle moisture.
A pot without drainage holes can trap excess water. Dense or compacted potting mix may also remain wet for too long, especially in a cool room or during periods of slow growth.
Inspect the following:
- Are there drainage holes at the bottom of the pot?
- Is water collecting inside a decorative outer container?
- Does the potting mix remain heavy and wet for days?
- Is the container much larger than the root system needs?
- Has the plant stopped growing while yellowing continues?
An oversized pot can retain more moisture than a small root system can use. This increases the risk of prolonged wet conditions.
When to inspect the roots
If the plant continues declining and the soil remains wet, a careful root inspection may be appropriate.
Remove the plant gently when practical. Healthy roots vary in color according to the species, so do not diagnose root rot based on color alone.
Instead, look for texture and smell. Roots that are firm are generally more reassuring than roots that are soft, mushy, deteriorating, or unpleasant-smelling.
If significant decay is present, remove clearly damaged roots with clean tools and repot the plant in fresh, suitable growing medium. Use a container with drainage holes and avoid unnecessarily disturbing healthy roots.
Repotting is not automatically necessary whenever leaves turn yellow. First determine whether the roots, pot, or growing medium are contributing to the problem.
UC IPM
+1
6. Consider Nutrient Deficiencies Carefully
Plants need essential nutrients to maintain chlorophyll, develop new leaves, and support normal growth. If nutrients are unavailable in sufficient quantities, foliage may become pale or yellow.
However, yellow leaves do not automatically mean that a plant needs fertilizer.
Root damage, unsuitable growing-medium conditions, and excessive watering can interfere with nutrient uptake. Adding fertilizer without identifying the underlying problem may worsen the plant’s condition.
What the pattern may tell you
Older leaves turning yellow: Limited nitrogen availability is one possible explanation, particularly when older foliage is affected first.
Yellow areas between green veins: This pattern can be associated with certain nutrient deficiencies, including iron-related chlorosis, depending on the species and which leaves are affected.
Pale new growth: Root problems, growing-medium pH, or limited availability of particular micronutrients may be involved.
Yellowing throughout the plant: Nutrient issues are possible, but watering, lighting, and root health should also be assessed.
These patterns are clues rather than definitive diagnoses. Similar symptoms can occur for different reasons, so visual inspection alone may not identify the exact cause.
University of Maryland Extension
+1
What should you do?
Review the plant’s watering, lighting, and root conditions first.
If the plant has been growing in the same potting mix for a long time, depleted nutrients may be contributing. Depending on the species and growing conditions, an appropriate fertilizer or fresh growing medium may help.
Follow the product label and the plant’s requirements. Avoid applying extra fertilizer in the hope of producing faster results.
7. Check for Temperature Changes and Environmental Stress
Temperature fluctuations can affect plants even when watering and lighting appear suitable.
Cold drafts, hot air from heaters, and air-conditioning vents can expose foliage to conditions that differ significantly from the rest of the room.
A plant near a window may experience cold temperatures at night, while one beside a heating vent may lose moisture more quickly than expected.
Look for recent changes, such as:
- Moving the plant to another room.
- Opening windows during cold weather.
- Placing the plant near heating or cooling equipment.
- Moving a houseplant outdoors without gradual acclimatization.
- Exposing the plant to sudden temperature changes.
Check the temperature requirements of the particular species before making adjustments.
Move the plant away from strong drafts or direct heat sources, and aim for reasonably stable conditions. If you relocate it, avoid changing its lighting and watering routine unnecessarily at the same time.
8. Inspect the Leaves for Pests and Disease
Pests can damage plant tissue and interfere with healthy growth. Some feed on plant sap, causing pale speckles, yellowing, distorted foliage, or leaf drop.
Inspect both sides of the leaves, the stems, and the points where leaves attach to the plant.
Look for:
- Fine pale speckles across the leaves.
- Delicate webbing near leaf joints.
- Sticky residue on foliage.
- Clusters of small insects on new growth.
- Cotton-like white patches.
- Small scale-like bumps on stems or leaves.
Spider mites, aphids, scale insects, and mealybugs can affect houseplants. However, not every spot or discoloration indicates a pest or infectious disease. Environmental stress and physical damage can create similar symptoms.
UC IPM
+1
If you suspect an infestation, separate the affected plant from nearby plants while investigating. Identify the likely pest before choosing a treatment, and follow the directions for any product you use.
Avoid applying household chemicals or unverified mixtures to the foliage, as these may cause additional damage.
9. Follow a Simple Diagnostic Routine
When several causes are possible, a consistent inspection routine can help prevent unnecessary interventions.
Use the following steps before making major changes:
- Observe the pattern. Note whether yellowing affects older leaves, new growth, leaf edges, or the entire plant.
- Check soil moisture. Examine the growing medium below the surface.
- Review drainage. Make sure water can escape and does not collect in the saucer.
- Assess light and temperature. Consider the plant’s location and any recent changes.
- Inspect the foliage. Look for pests, sticky residue, webbing, or unusual spots.
- Consider root health. Inspect the roots if persistent wet soil or continued decline makes root damage likely.
- Evaluate nutrients. Consider fertilizer only after assessing more immediate environmental and root-related causes.
- Make one targeted change. Address the cause best supported by your observations.
- Monitor the response. Record the date and watch for healthier new growth.
Changing several conditions at once can make it difficult to determine which adjustment helped. A measured approach makes it easier to learn what your plant needs.
10. Should You Remove Yellow Leaves?
Completely yellow, dead, or badly deteriorated leaves can usually be removed with clean scissors or pruning shears.
However, leaves that are still partly green may continue contributing energy through photosynthesis. Removing them too early can reduce the plant’s healthy foliage.
Do not remove large amounts of leaves simply because the plant looks unattractive. Address the underlying problem first.
If yellowing is spreading rapidly, stems are becoming soft, or the plant continues deteriorating, investigate further rather than relying on pruning alone.
Frequently Asked Questions
Can yellow leaves turn green again?
Fully yellow leaves generally do not return to their original green color. The goal is to correct the underlying cause and support healthy new growth.
Should I water my plant as soon as its leaves turn yellow?
No. Check the moisture in the growing medium first. Yellowing can result from both excessive and insufficient watering.
Is one yellow leaf a reason to worry?
Not necessarily. An occasional older leaf turning yellow may be part of normal growth. Widespread, rapid, or recurring yellowing deserves closer attention.
How long does recovery take?
Recovery depends on the plant species, the severity of the problem, and the condition of its roots. Look for stable growth and healthier new leaves rather than expecting damaged leaves to become green again.
Help Your Plant Recover by Finding the Cause First
Yellow leaves are a sign worth investigating, but they do not identify a single problem on their own.
Start by observing which leaves are affected, checking soil moisture and drainage, and reviewing the plant’s light and temperature conditions. Inspect for pests and consider nutrient issues only when the evidence supports them.
Make a targeted adjustment, give the plant time to respond, and monitor new growth. With careful observation and a consistent care routine, you can often identify problems earlier and avoid changes that create unnecessary stress.