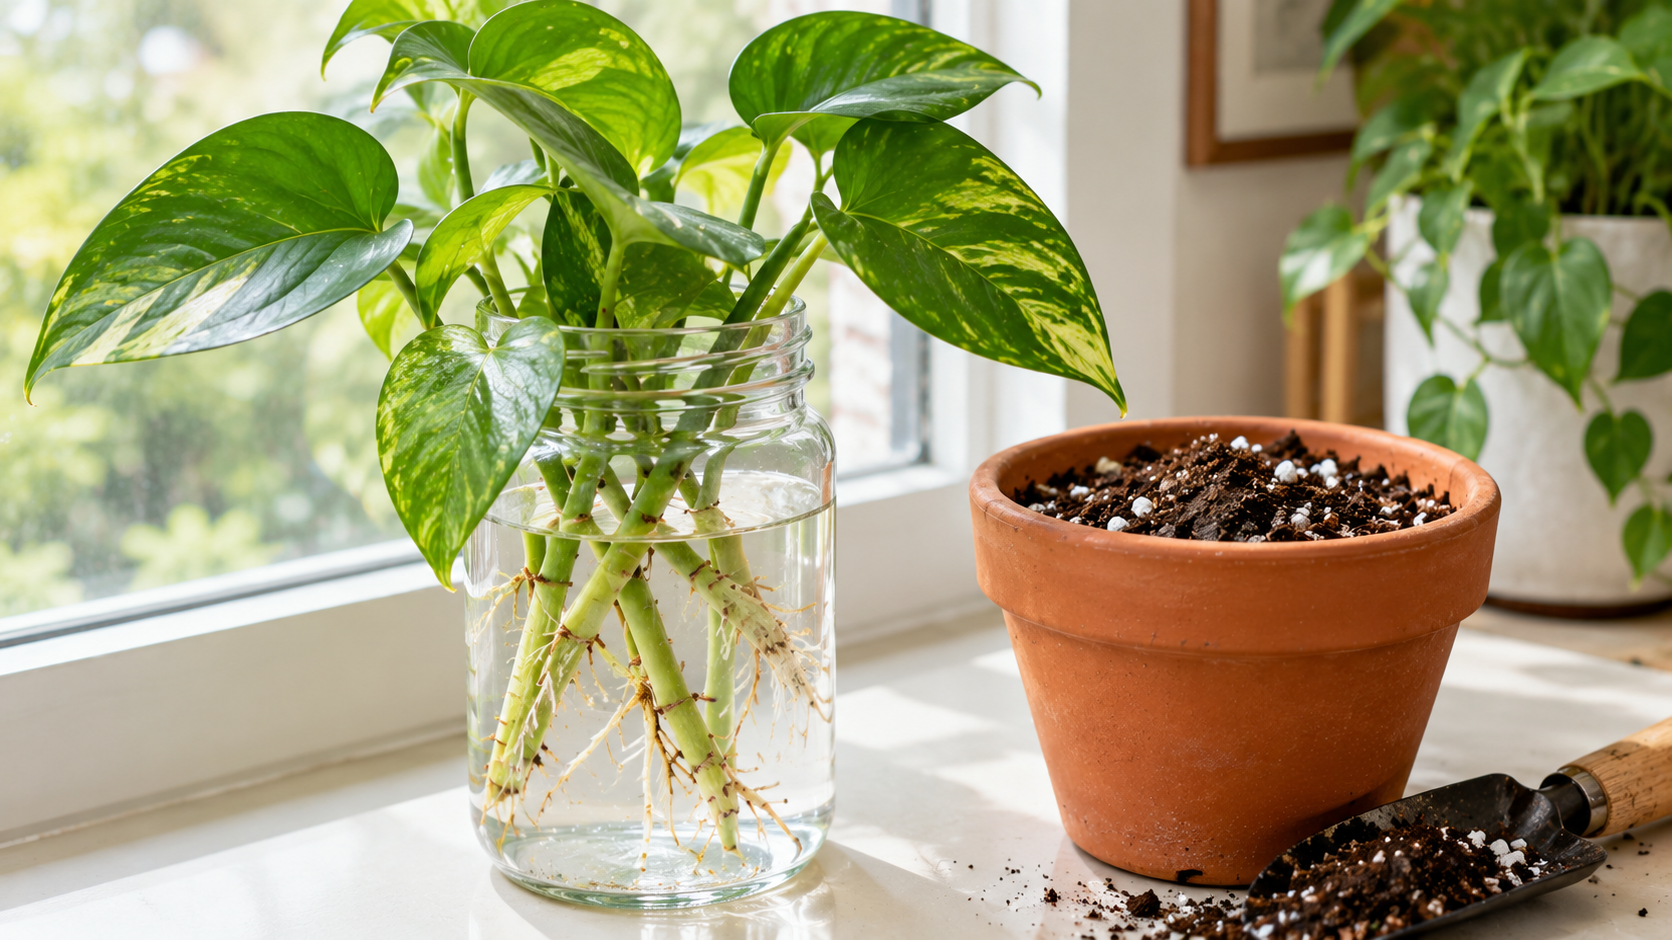
Propagating pothos in water is a simple way to grow new plants from a vine you already have. The roots develop where you can see them, making it easier to follow progress without digging into the growing medium. The tricky part is knowing when the cutting is ready to leave the jar and how to help it adjust to potting mix.
The secret is to focus on the cutting’s root development rather than a fixed number of days. A healthy pothos cutting needs a stem node, clean water, suitable light, and patience. Once it has several well-developed roots, you can transfer it to a small pot and gradually establish a normal watering routine.
Why Pothos Can Grow Roots in Water
Pothos (Epipremnum aureum), also called devil’s ivy, is a trailing tropical houseplant that can produce roots from nodes along its stems. A node is the point where a leaf attaches to the vine. It may look like a small joint or bump, sometimes with a tiny aerial root beginning to emerge.
When a cutting includes a healthy node, it can develop new roots under suitable conditions. A leaf by itself, without a piece of stem containing a node, will not normally grow into a complete new pothos plant.
Water propagation is popular because it makes root growth visible. However, roots that develop in water must adapt to the different moisture and air conditions of potting mix. That transition is possible, but the cutting may temporarily wilt or pause its growth while adjusting.
What You Need Before Starting
Gather a few basic supplies before cutting the parent plant:
- A clean pair of sharp scissors or pruning shears.
- A clear glass or jar.
- Fresh water at room temperature.
- A healthy pothos vine.
- A small pot with drainage holes for the eventual transplant.
- A well-draining houseplant potting mix.
You do not need rooting hormone for most healthy pothos cuttings. A clear container is useful because you can inspect the roots and water without disturbing the plant, although an opaque container can also work.
Choose a healthy parent plant with firm stems and leaves free from obvious pest damage. If the vine is severely stressed, has soft or blackened sections, or shows signs of disease, address those problems before using it for propagation.
Step-by-Step: Propagate Pothos in Water
1. Find a healthy node
Examine the vine and identify where a leaf joins the stem. For a useful cutting, include at least one node; two or more can provide additional rooting points and flexibility when planting.
Plan to make the cut just below the node so that the node remains on the piece you intend to propagate. A cutting with a leaf but no node is unlikely to develop the roots and new growth needed to become an independent plant.
2. Cut and prepare the stem
Use clean, sharp scissors to make a neat cut. If the cutting includes several leaves, remove the lowest leaf if it would otherwise sit beneath the waterline.
Keep at least one healthy leaf above the water. Leaves submerged for long periods tend to break down, which can make the water dirty and encourage decay.
If you are taking several cuttings, prepare each one separately and check that every section includes a node.
3. Place the cutting in water
Put the cutting in a clean jar and add enough water to cover the lower node. Keep the leaves above the surface and avoid submerging unnecessary portions of the stem.
Set the jar somewhere warm with bright, indirect light. A bright room near a window is often suitable, but avoid intense direct sunlight that can heat the water or scorch the leaves.
4. Maintain the water and inspect the cutting
Check the jar every few days. Top it up if evaporation lowers the water level and refresh the water if it becomes cloudy, develops an unpleasant smell, or accumulates debris. Cleaning the container during a water change can help prevent residue from building up.
Look for small, pale roots emerging from the node. Depending on the plant, temperature, light, and cutting condition, root development may take days or several weeks. A slow start does not automatically mean the cutting has failed if the stem remains firm and healthy.
If the stem becomes mushy, blackened, or foul-smelling, inspect it promptly. Remove decayed tissue with clean tools if a healthy node remains; otherwise, discard the damaged cutting and start again with a healthy section.
How to Recognize When Pothos Roots Are Ready for Potting Mix
The right time to transplant depends on the strength and development of the roots, not simply how long the cutting has been in water.
A cutting is generally a good candidate for potting when it has:
- Several visible roots rather than just one tiny root tip.
- Roots long enough to spread gently through the planting hole, often around 1–3 inches (2.5–7.5 cm).
- Firm, healthy-looking roots without a slimy coating or unpleasant smell.
- A stem that remains firm and at least one healthy leaf.
This root length is a practical guide, not a strict rule. A cutting with several branching roots may be ready sooner than one with a single long root and little branching. If the roots are still very short, giving them more time in clean water can make planting easier.
Should you wait for secondary roots?
Small side roots branching from the main roots are a helpful sign that the cutting is developing a more substantial root system. They are not an absolute requirement, but a few branching roots can help the plant establish itself after transplanting.
Avoid waiting so long that the roots become an extremely tangled mass in the jar. Long water-grown roots can be delicate and harder to position in a small pot without bending or breaking them.
How to Move a Water-Rooted Pothos into Potting Mix
Prepare the pot and mix before removing the cutting from the water. This limits the time the roots are exposed to air and helps make the transfer less stressful.
Step 1: Choose an appropriately sized pot
Use a small container with drainage holes. The pot should accommodate the roots comfortably without leaving a large volume of wet mix around a tiny root system.
An oversized pot is not necessarily better. Because the cutting has few roots to absorb moisture, excess potting mix may remain wet for too long and increase the risk of root problems.
Step 2: Prepare the growing medium
Choose a fresh, well-draining potting mix suitable for houseplants. Lightly moisten it before planting so it is evenly damp but not saturated.
Avoid using dense garden soil in a small indoor pot. A container mix generally provides a better balance of moisture retention and air space for developing roots.
Step 3: Make room for the roots
Create a hole deep enough to accommodate the roots without forcing them into a tight coil. Lower the cutting into the hole and position the node and roots beneath the surface while keeping the leaf stalks and leaves above the mix.
Fill around the roots and gently settle the mix with your fingers. Do not press it down hard; roots need air as well as moisture.
Step 4: Water carefully
Water gently until the mix is evenly moist and excess water drains from the bottom. Empty any saucer or decorative outer pot that collects standing water.
Place the newly potted cutting in bright, indirect light. Avoid intense direct sunlight while it adjusts, and do not add fertilizer immediately unless the product label and plant’s condition indicate it is appropriate.
Caring for Pothos During the Transition
Water-grown roots develop under conditions that differ from those in potting mix. After transplanting, the cutting may need time to adapt to the new balance of moisture and air. A little temporary drooping or a pause in growth can occur, but persistent decline deserves attention.
Keep moisture consistent, not excessive
For the first period after transplanting, check the mix regularly. It should not dry out completely while the small root system is establishing, but it should not remain saturated either.
Test the upper portion of the mix with a finger and consider the pot’s weight. If the mix is still wet, wait before watering again. If it is drying and the pot feels lighter, water thoroughly and allow it to drain.
There is no universal watering schedule. A small pot in a warm, bright room may dry faster than one in a cool room with less light.
Provide suitable light
Bright, indirect light supports adjustment and new growth. A dark corner can slow development, while harsh direct sunlight may increase water loss from the leaves.
Keep the plant in a stable location rather than repeatedly moving it between different light conditions. Once it is growing steadily, you can position it according to your preferred display and the plant’s light needs.
Know when to investigate
Some stress after transplanting can be temporary. However, take a closer look if the cutting continues to wilt, the stem becomes soft, the leaves deteriorate quickly, or the mix stays wet for an extended period.
Check whether the pot drains freely and whether the roots are sitting in saturated mix. If the roots are damaged, carefully inspect them and remove only clearly decayed tissue with clean tools. Then replant in fresh, appropriately moist mix if the cutting still has healthy roots and stem tissue.
Common Mistakes When Propagating Pothos
Avoiding a few preventable mistakes can make the process more reliable.
- Submerging the leaves: Keep foliage above the water to reduce decay and contamination.
- Taking a cutting without a node: Roots and new shoots typically develop from the stem’s nodes, so include at least one.
- Leaving dirty water unchanged: Refresh cloudy or foul-smelling water and clean the jar as needed.
- Moving the cutting too early: A cutting with only tiny root tips may be harder to establish in potting mix. Wait until it has several healthy roots.
- Using a pot that is too large: Excess mix can stay wet longer than the small root system can use it.
- Overwatering after transplanting: Water thoroughly when needed, but do not leave the pot standing in water.
- Adding fertilizer immediately: Newly developing roots can be sensitive to concentrated fertilizer. Allow the cutting to establish and follow the potting mix or fertilizer label.
Frequently Asked Questions
How long does pothos take to root in water?
It often takes a few weeks, but the timing varies with temperature, light, the parent plant’s health, and the cutting itself. Look for firm stems and developing roots instead of relying on a guaranteed deadline.
Can I leave pothos in water permanently?
Pothos can grow in water for an extended period, but maintaining it as a water-grown plant requires ongoing attention to water quality and nutrient availability. If your goal is a conventional potted houseplant, transplant it into suitable potting mix once the roots are sufficiently developed.
Should I change the water every day?
Usually, daily changes are unnecessary if the water remains clear and fresh. Check it every few days, top it up as needed, and replace it when it becomes cloudy or develops an unpleasant smell. Clean the container if residue builds up.
What if the cutting has roots but no new leaves?
Root formation and new shoot growth do not always happen at the same pace. Check that the cutting has a viable node, receives bright indirect light, and remains firm. Give it time if it looks healthy, but inspect it for decay if the stem becomes soft or dark.
Can I put several cuttings in one pot?
Yes. Planting several rooted cuttings in one appropriately sized pot can create a fuller-looking pothos. Arrange the roots gently, avoid overcrowding them, and ensure the container has good drainage.
A Simple Rule for Successful Transplanting
The best time to move pothos from water to potting mix is when the cutting has several healthy roots that can be arranged comfortably in a small pot. Prepare the container first, handle the roots gently, and keep the growing medium lightly and evenly moist while the plant adjusts.
After transplanting, focus on the plant’s response rather than making frequent changes. New growth may take time, but steady conditions, appropriate light, and careful watering give the cutting a good opportunity to establish itself.