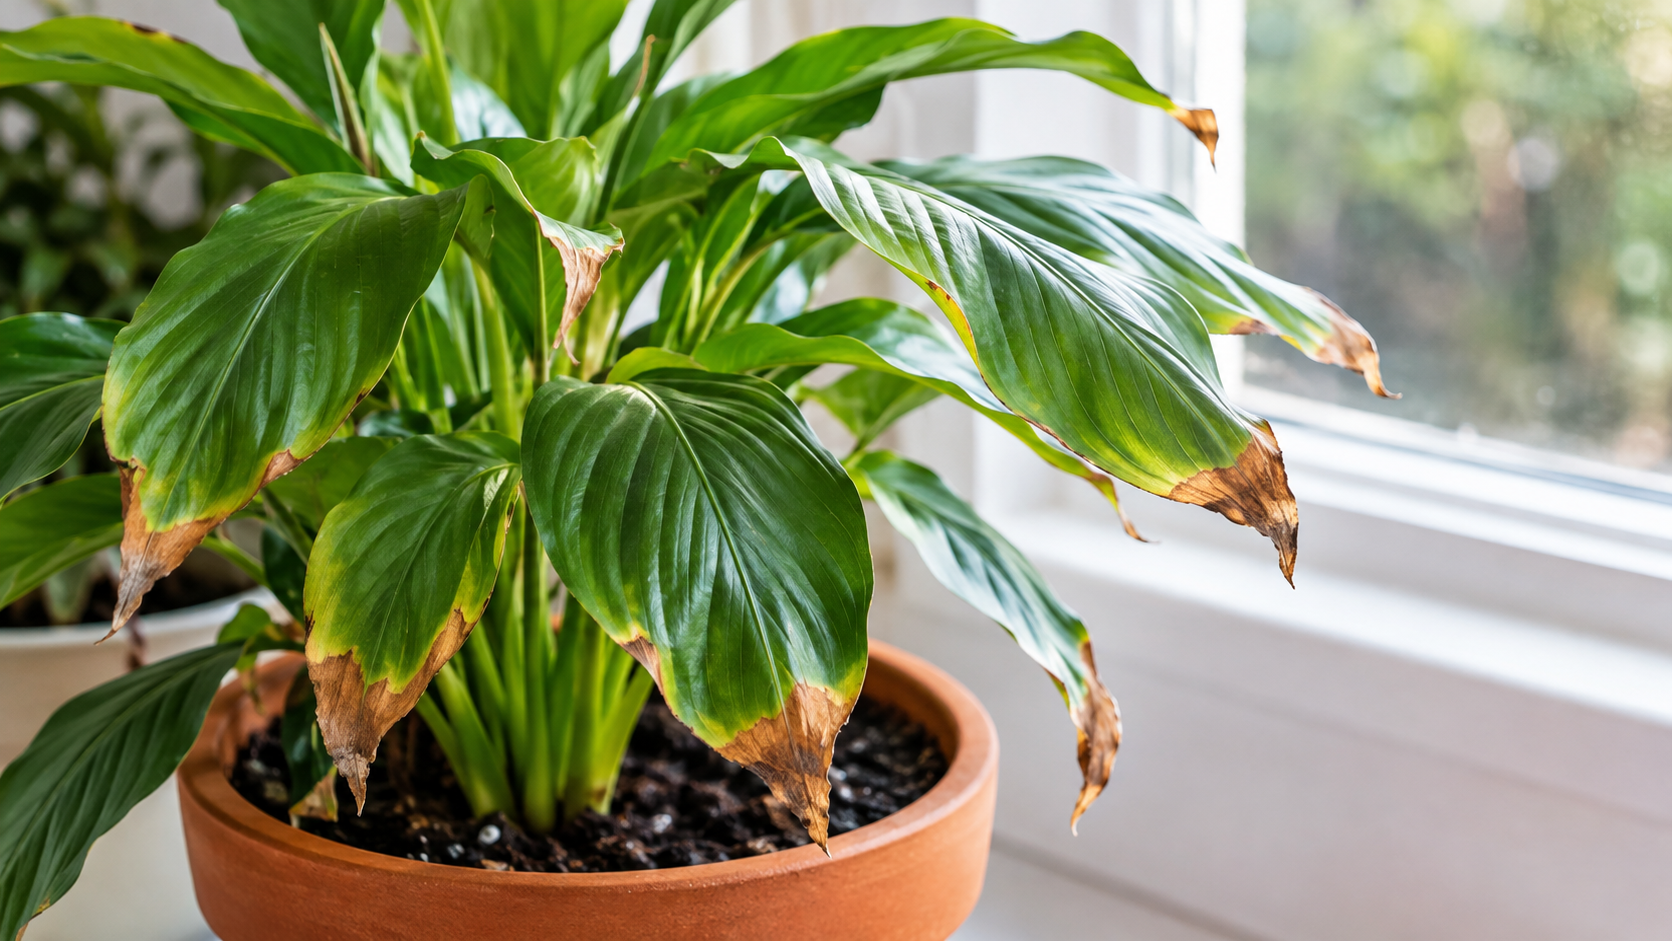
Brown tips on houseplant leaves can be frustrating, especially when the rest of the plant looks healthy. You may notice the edges becoming dry and crispy, the tips turning dark, or the damage gradually spreading across several leaves. Even when you follow a regular watering schedule, the problem can continue.
The challenge is that brown leaf tips are a symptom, not a diagnosis. They can result from inconsistent watering, low humidity, excessive fertilizer, mineral buildup in the soil, unsuitable light, or other environmental stresses. Sometimes, more than one factor is responsible.
The best way to protect your plants is to identify the most likely cause before changing their care routine. This guide explains how to examine the leaves, check the soil, recognize environmental warning signs, and choose practical solutions for healthier indoor plants.
What Do Brown Leaf Tips Tell You About Your Plant?
The appearance of damaged leaves provides useful clues, although no single pattern proves the cause.
Brown tips that feel dry and brittle often indicate that the leaf tissue has lost moisture or suffered chemical stress. If the damage affects several leaves at once, consider whether the plant has experienced a recent change in watering, fertilizer, temperature, or location.
Pay attention to the pattern of the damage:
- Dry, crispy tips: Possible causes include low humidity, irregular watering, and excess soluble salts.
- Brown edges along several leaves: Consider dry air, water quality, or fertilizer accumulation.
- Large, pale-brown patches: Strong sunlight, heat, cold exposure, or leaf injury may be responsible.
- Brown areas accompanied by yellowing and wilting: Check root health and soil moisture, particularly if the pot stays wet for long periods.
- Small, spreading spots: Inspect for pests or disease, especially when the marks are irregular or appear on multiple parts of the leaf.
According to Iowa State University Extension and the University of California’s Integrated Pest Management program, brown leaf tips and margins can have several causes, so diagnosis should consider the plant’s growing conditions as well as the visible damage.
Yard and Garden
+1
1. Check Whether Your Watering Routine Is the Problem
Watering is one of the first things to investigate because both insufficient moisture and excessive watering can damage leaves.
Signs of underwatering
When the potting mix becomes too dry for too long, roots cannot supply the leaves with enough water. The tips and edges may turn brown, and the leaves can become curled, limp, or brittle.
Check the soil rather than relying only on the appearance of the foliage. The surface may look dry while deeper layers remain moist, or the opposite may happen in a pot that dries quickly.
Insert a finger into the growing medium or use a moisture meter to check below the surface. Lift the pot, if practical, to compare its weight when dry and after watering.
Signs of overwatering
Too much water can deprive roots of oxygen, especially when the growing medium drains poorly. Damaged roots may struggle to absorb water even when the pot is wet.
Look for several clues together:
- Soil that remains wet for many days.
- Yellowing leaves and persistent wilting.
- A pot without drainage holes or a blocked drainage opening.
- A sour smell or visibly deteriorating roots in severe cases.
Brown tips alone do not establish that a plant has root rot. However, brown tips accompanied by yellow leaves and soggy soil are a reason to investigate the roots.
How to correct watering problems
- Check the soil moisture before adding water.
- Learn the preferred moisture level for your plant species.
- When watering is needed, moisten the root zone thoroughly and allow excess water to drain.
- Empty any saucer or decorative outer pot that collects standing water.
- Adjust the interval according to the plant, pot size, light, temperature, and season.
Avoid following a universal schedule such as watering every three days. A small pot in bright light can dry much faster than a large pot in a cool room.
2. Determine Whether the Environment Is Too Dry, Hot, or Bright
A plant can receive the correct amount of water and still develop brown leaf tips because its surroundings increase moisture loss or expose the foliage to stress.
Low humidity
Low indoor humidity is a common cause of brown tips, particularly in tropical houseplants and species with delicate foliage. Dry air can cause leaf margins to lose moisture faster than the plant can replace it.
Check whether the damage is concentrated at the ends of otherwise green leaves. Consider whether the plant sits near an air conditioner, heater, frequently opened exterior door, or another source of dry airflow.
What to do: Use a room humidifier if the species benefits from higher humidity. Grouping compatible plants together may also help create a slightly more humid local environment.
A pebble tray may have a limited effect on humidity immediately around a plant. Keep the pot above the water level rather than allowing its base to sit in standing water. Misting is usually a temporary measure and is not a reliable substitute for maintaining suitable room humidity.
Excessive sunlight and heat
Some houseplants tolerate direct sunlight, while others develop scorched patches when moved suddenly into strong sun.
Sun damage often appears as pale, tan, or brown areas on the side facing the window. It may affect broader sections of the leaf rather than producing only dry tips.
To reduce further damage:
- Move sensitive plants away from harsh afternoon sunlight.
- Use a sheer curtain where appropriate.
- Introduce stronger light gradually when acclimating a plant.
- Keep foliage away from hot air vents and radiators.
Do not automatically place every plant in a darker location. Insufficient light can also weaken growth and contribute to other leaf problems. Match the adjustment to the plant’s actual light requirements.
Temperature changes and drafts
Cold windows, sudden temperature fluctuations, and direct airflow from heating or cooling equipment can stress foliage. If browning began shortly after moving a plant, review what changed in its location.
For more guidance, the University of Connecticut’s information on ailing houseplants explains how light, temperature, humidity, and watering affect indoor plant health.
3. Find Out Whether Fertilizer or Mineral Buildup Is Responsible
Fertilizer supports healthy growth, but applying too much can damage roots and leaf tissue. Excess soluble salts interfere with water uptake, potentially causing brown, dry tips even when the soil appears adequately moist.
Clues that suggest fertilizer burn
Consider fertilizer accumulation when:
- Browning developed after a recent feeding.
- You applied a stronger solution than the product label recommends.
- Fertilizer has been used frequently without accounting for the plant’s growth rate.
- A white crust appears on the soil surface or around the pot’s rim.
White deposits can also come from minerals in the water, so their presence does not automatically mean you used too much fertilizer.
How to reduce excess salts
If the plant is growing in a suitable potting mix with good drainage, flushing the growing medium with clean, low-mineral water may help remove accumulated soluble salts.
- Confirm that the container has open drainage holes.
- Place the pot where excess water can drain freely.
- Slowly water the growing medium thoroughly, allowing water to pass through the pot.
- Let it drain completely before returning it to its usual position.
- Pause additional fertilization until you have assessed the plant’s condition and its normal feeding requirements.
Do not flush a plant if its growing medium is already waterlogged or drainage is poor. Correct the drainage issue first. If the buildup is severe, the mix is deteriorated, or the roots are damaged, repotting into an appropriate fresh medium may be more suitable.
University of Maryland Extension provides further details in its guide to mineral and fertilizer salt deposits on indoor plants.
Could the water itself be the issue?
Yes. Some tap water contains minerals or other substances that sensitive plants may not tolerate well over time. Spider plants, dracaenas, and certain prayer plants can be particularly susceptible to tip damage associated with water quality.
If several plants develop similar symptoms despite appropriate watering and fertilization, consider whether they share the same water source.
You can compare the available water sources and, if necessary, try rainwater collected safely or distilled water for a sensitive species. Check the plant’s particular needs before making a permanent change. Simply leaving tap water standing overnight does not remove fluoride or dissolved mineral salts.
4. A Practical Method for Identifying the Most Likely Cause
Rather than changing everything at once, work through a short diagnostic routine.

Step 1: Examine the leaves
Identify whether the damage affects only the tips, the entire margins, or larger patches. Look for yellowing, curling, spots, and visible pests.

Step 2: Check the soil and roots
Determine whether the mix is excessively dry, persistently wet, compacted, or poorly drained. Inspect roots only when other signs justify disturbing the plant.

Step 3: Review the environment
Consider humidity, direct sunlight, heating vents, drafts, and any recent relocation.

Step 4: Review water and fertilizer
Check the feeding history, product concentration, frequency of application, water source, and any mineral deposits.
After these checks, choose the most plausible explanation and correct that issue first. If two causes are strongly supported, such as low humidity and irregular watering, address both without making unrelated changes.
Keep a simple record of watering dates, fertilizer applications, and environmental adjustments. Photograph the same leaves periodically so you can distinguish ongoing damage from old damage that is no longer progressing.
5. Should You Cut Off the Brown Tips?
Trimming brown tips is optional. It can improve a plant’s appearance, but it will not solve the underlying problem.
If you decide to trim the damaged tissue, follow these guidelines:
- Use clean, sharp scissors.
- Follow the natural shape of the leaf rather than cutting deeply into healthy tissue.
- Leave a very narrow brown margin if necessary to avoid cutting into the green portion.
- Remove an entire leaf only when it is extensively damaged, dead, or affected by a problem that warrants removal.
Brown tissue will not turn green again. The best sign of recovery is that newer leaves develop normally and existing damage stops spreading.
Avoid removing large amounts of healthy foliage simply because a few tips look unattractive. Green leaves still contribute to photosynthesis and help support new growth.
6. Common Mistakes That Can Make Brown Tips Worse
Several well-intentioned actions can increase stress instead of resolving the problem.
- Watering more frequently without checking the soil: This can create waterlogged conditions and damage roots.
- Adding fertilizer to improve brown leaves: If excess salts are responsible, additional fertilizer may worsen the damage.
- Moving the plant repeatedly: Frequent changes in light and temperature make it harder to determine what is helping.
- Mist-spraying leaves constantly: Misting does not reliably maintain higher humidity and can leave foliage wet for extended periods.
- Using home remedies without checking their effects: Household ingredients and improvised treatments may alter soil conditions or damage leaves.
- Expecting damaged tips to recover: Existing brown tissue generally remains brown, even after the underlying cause is corrected.
A more reliable strategy is to make evidence-based adjustments, keep the plant’s conditions consistent, and observe the new growth.
7. How to Prevent Brown Leaf Tips in the Future
Prevention begins with matching care to the plant rather than following a single routine for every species.
- Water according to soil moisture. Learn how deeply the growing medium should dry before the next watering.
- Use containers with drainage holes. Choose a suitable potting mix that retains enough moisture without staying saturated.
- Fertilize carefully. Follow the product label and adjust feeding to the species, season, and growth rate.
- Monitor indoor humidity. Tropical plants may need conditions that differ from those preferred by succulents and other dry-climate species.
- Provide appropriate light. Avoid sudden transitions from shade to strong direct sunlight.
- Review water quality when symptoms persist. Sensitive plants may react to dissolved minerals or particular water treatments.
- Inspect foliage regularly. Early changes are easier to investigate before multiple leaves become damaged.
Remember that occasional browning on an older leaf does not always indicate a serious problem. Look at the plant as a whole, including its new growth, stems, roots when appropriate, and overall vigor.
Frequently Asked Questions
Can brown leaf tips turn green again?
No. Once leaf tissue has died and turned brown, it generally cannot recover. Correcting the cause can protect the remaining foliage and support healthier new leaves.
Do brown tips always mean the plant needs more water?
No. Underwatering is one possibility, but overwatering, low humidity, excess fertilizer, mineral buildup, and unsuitable environmental conditions can produce similar symptoms.
Should I stop fertilizing a plant with brown tips?
If excessive fertilizer or salt accumulation is suspected, pause feeding while you investigate. However, brown tips alone do not prove fertilizer damage. Resume an appropriate feeding routine once the cause has been assessed and the plant’s needs are clear.
How long does it take for a plant to recover?
The timing depends on the species, severity of the damage, growing conditions, and the cause. Existing brown areas will remain visible, so evaluate recovery by monitoring whether new damage appears and whether new leaves develop normally.
Help Your Plant Recover by Changing the Right Thing
Brown leaf tips are a useful warning that something in a plant’s growing conditions may need attention. The most effective response is to check the soil, review the environment, and investigate fertilizer and water quality before making major changes.
Start with the evidence you can observe, correct the most likely cause, and give the plant time to respond. With consistent care suited to its species, you can reduce further damage and create better conditions for healthy growth.