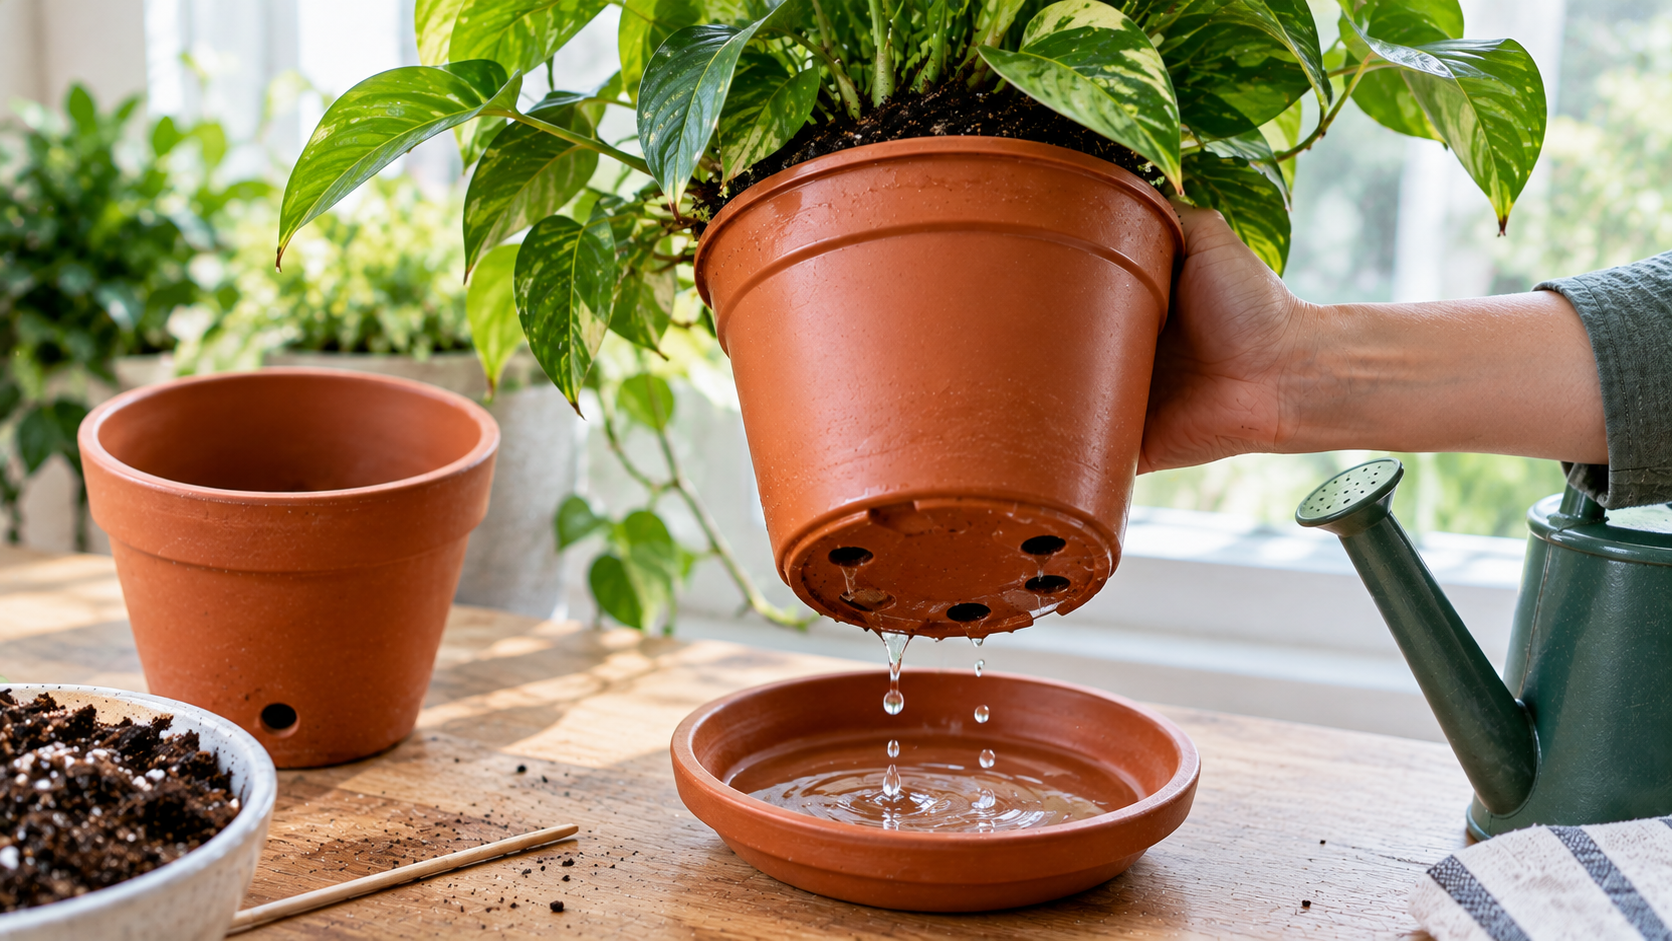
A plant pot can look attractive, contain fresh potting mix, and hold a healthy-looking plant while still having a hidden problem: water that cannot escape. When excess water remains trapped around the roots, the growing medium may become waterlogged, leaving too little air for roots to function properly.
Drainage holes help prevent this problem by allowing surplus water to leave the container after watering. However, simply having a hole in the bottom does not guarantee that a pot drains well. The opening may be blocked, the pot may sit flat against a surface, or the potting mix may be too compact to let water move through it efficiently.
Learning how to inspect drainage helps you make better watering decisions, choose suitable containers, and recognize problems before they seriously affect a plant. With a few simple checks, you can evaluate most pots without removing the plant or disturbing its roots.
Why Drainage Holes Are Important for Potted Plants
Plant roots need both moisture and oxygen. Water supplies essential resources for plant growth, but the spaces between particles in a healthy growing medium also need to contain air.
When excess water drains away, air can move back into some of these spaces. If the mix remains saturated for too long, oxygen becomes less available to roots, increasing the risk of root damage and root rot.
According to the University of Illinois Extension, drainage holes are critical because they allow water to flow out of containers and help maintain conditions suitable for healthy roots. Different plants tolerate different moisture levels, but most common houseplants do not thrive in persistently waterlogged potting mix.
Drainage is not the same as drying quickly
A pot with good drainage does not necessarily dry out immediately. Drainage refers to the movement of excess water out of the container, while drying depends on several factors, including:
- The plant species and its water requirements.
- The type and structure of the potting mix.
- The size and material of the container.
- Temperature, humidity, and air movement.
- The amount of light the plant receives.
- The size and activity of the root system.
For example, a tropical foliage plant may prefer evenly moist potting mix, while a cactus generally needs a mix that dries more readily between waterings. Both can benefit from suitable drainage, but they should not follow the same watering schedule.
What happens when drainage is poor?
Poor drainage can contribute to several problems:
- Yellowing or dropping leaves.
- Persistent moisture in the potting mix.
- Slowed growth and general decline.
- Roots that become brown, soft, or damaged.
- Unpleasant odors from decomposing organic material in severely waterlogged conditions.
These signs are not proof of a drainage problem by themselves. Underwatering, pests, unsuitable light, and other root problems can produce similar symptoms. Check the pot and growing medium before deciding what is wrong.
How to Check Whether a Pot’s Drainage Holes Work
You can perform a basic drainage inspection without taking the plant out of its container. The aim is to determine whether water can leave the pot freely and whether anything is preventing the process.
Step 1: Inspect the bottom of the pot
If the plant is easy to lift safely, gently raise the pot or tilt it enough to examine the bottom. Look for one or more drainage holes.
Some containers have removable plugs that cover preformed openings. Others have holes that are difficult to see because of their shape or because the pot sits inside a decorative outer container.
If the plant is in a nursery pot placed inside a ceramic or decorative planter, remove the inner pot and check both containers separately. The inner pot may drain correctly while the outer one collects water.
Step 2: Look for visible obstructions
Examine the opening for:
- Compact clumps of potting mix.
- Dead roots or roots growing across the hole.
- A plastic label, plug, or packaging material.
- A saucer or flat surface pressed tightly against the opening.
- Mineral deposits or other accumulated debris.
If an opening is blocked by loose material, clear it gently with a wooden skewer or similar blunt tool. Avoid pushing deeply into the pot, where the tool could damage roots.
A drainage hole that looks open from the outside may still be restricted by compacted mix immediately above it.
Step 3: Check the saucer or decorative planter
After watering, inspect the area beneath the pot. Water should be able to exit the drainage holes without remaining trapped around the base.
If the inner pot sits in a watertight decorative container, lift it out and check for standing water. Empty the outer container before returning the plant.
Likewise, empty a conventional saucer after the excess water has drained. Leaving the pot standing in collected water can allow the growing medium to remain saturated longer than intended.
Step 4: Observe the next watering
The simplest functional test is to observe what happens during normal watering.
- Place the pot somewhere that can safely handle excess water.
- Water the growing medium gradually and evenly, taking the plant’s moisture needs into account.
- Watch the bottom of the pot for water emerging from the drainage holes.
- Allow excess water to drain before returning the pot to its usual position.
- Check whether water has accumulated in a saucer or outer container.
Water emerging from the holes is a useful sign that an outlet exists, but it does not prove that the entire root zone is draining appropriately. Water may also run down a gap between very dry potting mix and the container wall without thoroughly moistening the mix.
If water fails to emerge, do not immediately add more. Check whether the mix is already wet, whether the holes are blocked, and whether the container is designed for a specialized watering system.
Common Signs of Poor Drainage
Drainage problems are easier to address when you look at several clues together rather than relying on one symptom.
The potting mix stays wet for too long
If the surface remains wet for many days, investigate further. A large pot, low light, cool temperatures, a water-retentive mix, or a small root system can all slow drying.
Check the moisture below the surface with a finger or wooden stick. If the lower mix remains very wet, inspect the drainage holes and consider whether the container is too large for the plant.
Water pools on the surface
Water that sits on top of the mix instead of soaking in may indicate compaction, a crusted surface, or a mix that has become difficult to rewet. It does not always mean the drainage holes are blocked.
Water slowly in small amounts and observe whether the mix absorbs it. If water repeatedly pools or immediately escapes along the sides, the growing medium may need attention.
The plant develops yellow leaves or wilts
Yellowing and wilting can occur when roots are damaged by excessive moisture, but they can also result from drought, nutrient problems, pests, or environmental stress.
Before watering again, check the moisture in the root zone and inspect the pot’s drainage. If the plant continues to decline despite appropriate care, a closer root inspection may be necessary.
What to Do If Water Does Not Drain Properly
The best solution depends on the cause. Avoid changing the pot, soil, and watering routine all at once, because doing so can add unnecessary stress and make it harder to identify the original problem.
Clear a blocked drainage hole
For a visible blockage, remove loose debris gently. If roots have grown across the opening, avoid pulling them out forcefully.
When a pot is heavily root-bound, repotting may be more appropriate than repeatedly clearing the same opening. Choose a container with working drainage holes and enough room for healthy root growth.
Improve the growing medium
A dense or compacted potting mix may retain too much water even when the holes are open. Garden soil is often unsuitable for indoor containers because it can compact and drain poorly in a confined space.
Use a potting mix suited to the plant. Components such as perlite or coarse bark can improve air space in appropriate mixes, but the ideal blend depends on the species. Succulents and cacti generally need a more freely draining mix than many moisture-loving tropical plants.
Raise the pot slightly if the outlet is obstructed
A drainage hole pressed against a flat surface may not release water freely. Pot feet or a suitable stand can create space beneath the container, especially outdoors.
Raising the pot will not fix compacted soil or a blocked opening, so first check that the hole itself is clear.
Repot when the existing setup cannot be corrected
Repotting is worth considering if the container has no drainage holes, the growing medium has deteriorated, or the roots show signs of serious damage.
Choose a pot with drainage openings and avoid moving the plant into an unnecessarily large container. Excess potting mix that is not yet occupied by roots can remain wet for too long.
If roots are brown, soft, or foul-smelling, inspect them carefully. Remove clearly decayed material with clean tools and use fresh, suitable potting mix. Severe root damage may not be reversible, so recovery is not guaranteed.
Should You Add Gravel to the Bottom of a Pot?
A common gardening tip recommends adding stones, gravel, or broken pottery beneath the potting mix to improve drainage. For ordinary plant containers, this is generally not the best solution.
A layer of coarse material beneath finer potting mix can cause water to accumulate in the mix above the boundary instead of making it drain more effectively. It also reduces the volume available for roots.
A better approach is to use a pot with open drainage holes and an appropriate growing medium throughout the container. If you want to keep potting mix from falling through a large opening, a piece of suitable mesh can help without creating a thick gravel layer.
For decorative containers without holes, consider using them as outer covers rather than planting directly into them.
Pots Without Drainage Holes: Are They Ever Practical?
A pot without drainage holes can be used decoratively, but watering requires greater care because excess water has no direct outlet.
The safer option for most houseplants is double potting: grow the plant in a plastic or nursery pot with drainage holes, then place that pot inside the decorative container.
After watering, remove the inner pot or lift it out enough to let it drain completely. Empty any water collected in the outer container before replacing it.
Specialized self-watering containers are a different case. They may use a reservoir, a wick, or an overflow opening to regulate water availability. Follow the manufacturer’s instructions rather than treating these designs like ordinary pots.
Frequently Asked Questions
How many drainage holes should a pot have?
There is no single number suitable for every container. The size, design, material, and intended plant all matter. What matters most is that the openings are sufficient for excess water to escape freely and remain unobstructed.
Is it normal for water to come out immediately?
It can be normal, especially when the mix is already moist or the potting medium contains plenty of air space. However, if water escapes immediately while the mix remains dry, the medium may have shrunk away from the pot or become difficult to rewet. Check moisture inside the root zone rather than assuming the plant has received enough water.
Can a pot have drainage holes and still cause root rot?
Yes. Drainage holes cannot compensate for frequent overwatering, unsuitable potting mix, or a container that stays submerged in collected water. Root problems may also arise from disease or other unfavorable conditions.
Should I water until water comes out of the bottom?
For many common houseplants, watering thoroughly until excess water drains out is a useful method. Adjust the amount and frequency for the plant’s needs, and allow the pot to drain afterward. Plants in specialized self-watering systems may require a different routine.
Make Drainage Checks Part of Your Plant-Care Routine
Whenever you buy a pot, repot a plant, or notice unexplained changes in growth, inspect the drainage holes and the space beneath the container. During regular watering, observe whether excess water escapes and whether the mix absorbs moisture evenly.
If drainage is poor, identify the likely cause before making changes. Clearing a blockage may be enough; compacted mix or a container without an outlet may require a different solution.
The key is to balance moisture with access to air around the roots. A suitable container, an appropriate potting mix, and watering based on the plant’s actual needs provide a much stronger foundation for healthy growth than any single drainage trick.