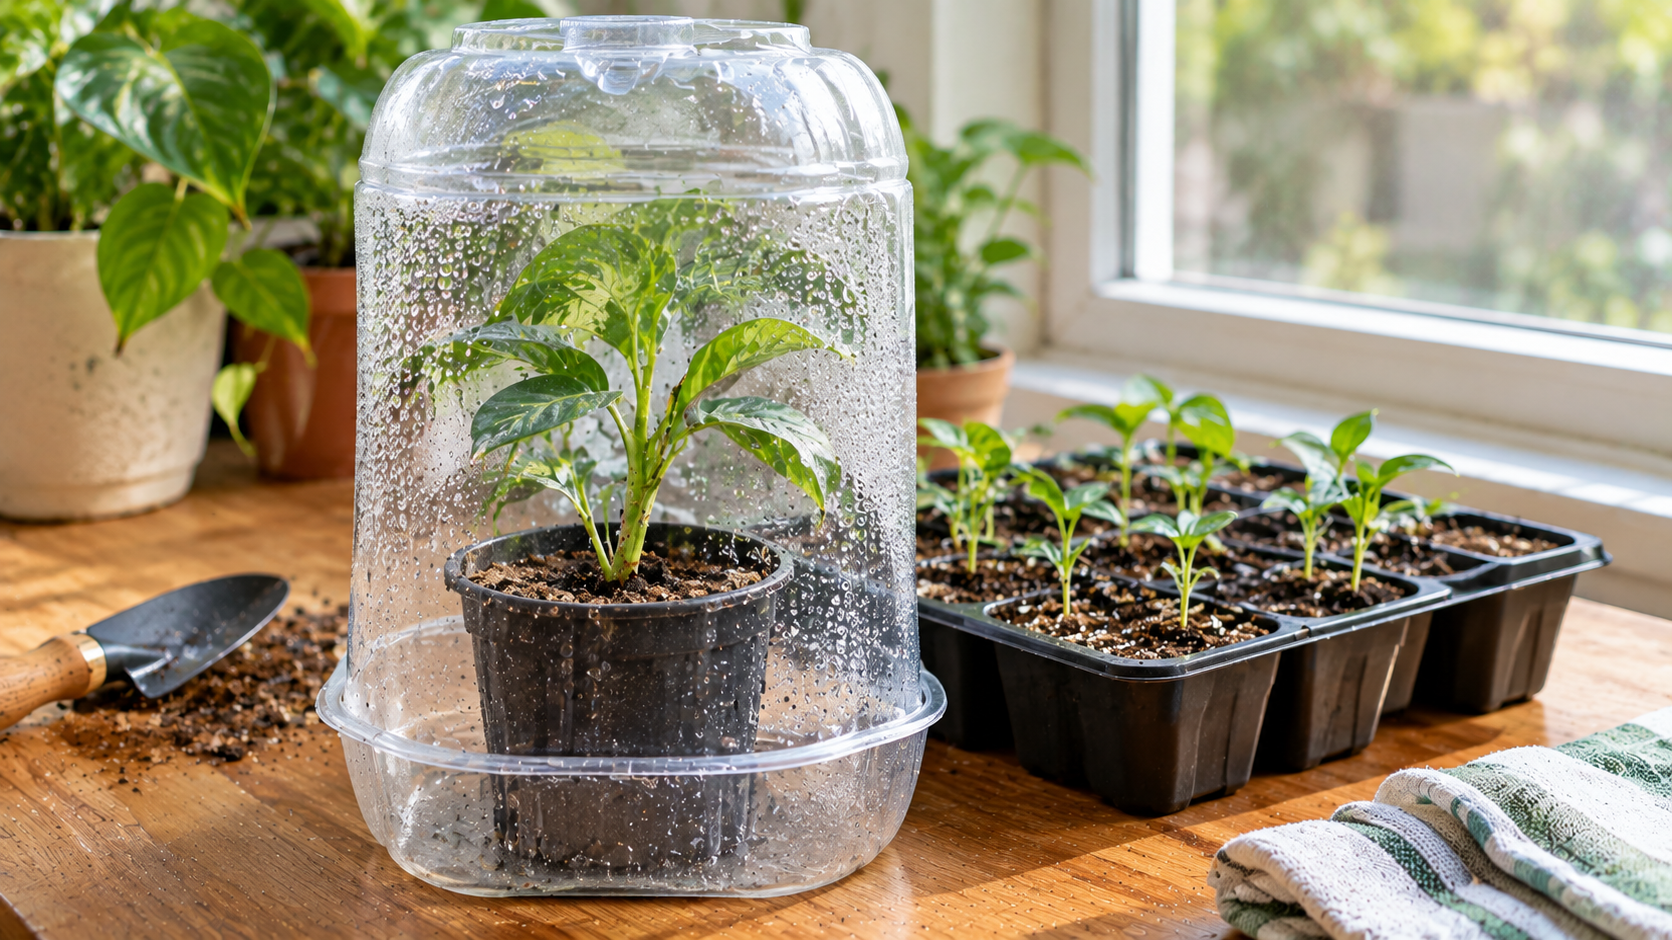
Some seeds and plant cuttings dry out quickly when exposed to ordinary indoor air. A newly rooted cutting may not yet have enough roots to replace the moisture lost through its leaves, while certain seeds need consistent moisture to germinate. A simple homemade mini greenhouse can help by trapping humidity around the plant and reducing how quickly water escapes.
You do not need expensive equipment to create this environment. A clean plastic bottle, a transparent storage container, or a clear plastic bag supported above a pot can work for small propagation projects. The important part is knowing which plants benefit from extra humidity, how to provide ventilation, and when to remove the cover so moisture does not become a problem.
What Is a Homemade Mini Greenhouse?
A mini greenhouse is a small, transparent enclosure that creates a more humid microclimate around seeds, cuttings, or young plants. It slows moisture loss from the growing medium and plant surfaces, helping some plants remain hydrated while they germinate or develop roots.
Unlike a full-size greenhouse, a homemade version is designed for just one pot or a small tray. It can be especially useful in homes with dry indoor air, air conditioning, or heating that makes delicate cuttings wilt before they establish roots.
How does it help plants retain moisture?
Leaves naturally lose water through a process called transpiration. A cutting without roots cannot replace that lost water as efficiently as an established plant. By increasing humidity around its leaves, a cover reduces the difference between the moisture inside the plant and the surrounding air, which can slow water loss.
A cover also reduces evaporation from the growing medium. This can help keep the medium consistently moist for germination and propagation, but it does not mean the soil should remain soaked.
The goal is humid air and a moist—not waterlogged—growing medium. Too much moisture combined with stagnant air can encourage mold, stem rot, and damping-off disease in seedlings.
Which Plants Benefit From a Mini Greenhouse?
A mini greenhouse is most useful during specific stages of growth rather than as a permanent home for every plant.
Plants grown from cuttings
Some cuttings benefit from high humidity while they develop roots. Examples include cuttings from certain pothos, philodendrons, coleus, and other tropical foliage plants, provided the propagation method is suitable for the species.
Because cuttings have limited or no functioning roots at first, they are particularly vulnerable to dehydration. A transparent cover can help them maintain moisture while roots form.
However, not every plant cutting needs a closed enclosure. Some species root readily in open air, and succulent cuttings often need different treatment because excessive humidity and wet conditions can promote rot.
Seeds and newly germinated seedlings
A cover can help keep seed-starting mix from drying out before germination. It is especially useful for small seeds that need consistent surface moisture.
Once seedlings emerge, their needs change. Many young seedlings benefit from better air circulation and lower humidity than they needed during germination. Remove the cover promptly after emergence or follow the specific requirements of the plant being grown.
Plants that usually do not need constant covering
Established houseplants generally do not need to be enclosed in a mini greenhouse simply because indoor humidity is low. A cover may reduce airflow and create unnecessary disease risks.
Cacti and many succulents also require caution. Their water-storage tissues and propagation needs differ from those of delicate tropical cuttings. Use a cover only when the species and propagation method call for it.
Materials for a Simple DIY Mini Greenhouse
Choose materials that are easy to clean, transparent enough to admit light, and large enough to avoid crushing leaves.
Useful household options include:
- A clean, clear plastic bottle for a single small pot.
- A transparent food container or storage box with a lid.
- A clear plastic bag supported by wooden skewers or plant stakes.
- A seed tray with a transparent cover.
- Small pots with drainage holes.
- A suitable seed-starting or propagation mix.
- Clean scissors and a small watering container.
Avoid containers that previously held chemicals or other substances that could leave harmful residues. Wash reusable materials with soap and water, rinse thoroughly, and let them dry before use.
The enclosure should fit the plant without pressing the plastic against its leaves. Contact with wet plastic can keep foliage continuously damp and increase the risk of damage or disease.
How to Build Your Mini Greenhouse Step by Step
There are several ways to make a small humidity enclosure. Choose the design according to the size of the plant and how often you need to access it.
Option 1: A clear plastic bottle for one small pot
This is a practical choice for an individual cutting or a small seedling.
- Clean a transparent plastic bottle and remove any labels that obstruct light.
- Carefully cut off the bottom of the bottle. If using scissors or a craft knife, work slowly and keep your hands away from the cutting edge.
- Place the plant in a pot with drainage holes and lightly moistened propagation mix.
- Position the bottle over the pot, making sure it does not crush the leaves.
- Leave the cap off or adjust the opening to allow some air exchange.
- Place the setup in bright, indirect light and monitor its temperature and moisture.
The bottle should be tall enough to leave space above the foliage. If the plant outgrows it, switch to a larger enclosure instead of bending the leaves.
Option 2: A clear plastic bag supported by stakes
This method works well for cuttings planted in small pots.
- Insert three or four clean stakes around the edge of the pot.
- Water the growing medium enough to make it evenly moist, then let excess water drain.
- Place a clear plastic bag over the stakes so it forms a loose tent.
- Secure the bag around the pot without sealing it so tightly that air exchange becomes impossible.
- Check the cutting daily and open the bag when ventilation is needed.
The stakes prevent the plastic from resting directly on the leaves. This is important because foliage that remains wet for long periods can become more vulnerable to disease.
Option 3: A transparent storage container for several pots
For multiple cuttings or small seed trays, use a clean, transparent container with a lid.
Arrange the pots inside with enough space between them for air to circulate. The lid can be left slightly ajar or opened periodically to provide ventilation. If the container has no drainage, keep the plants in their own pots and prevent water from collecting at the bottom.
Do not place the container in direct sunlight. Sunlight passing through clear plastic can rapidly raise the temperature inside, even when the room itself feels comfortable.
Light, Water, and Ventilation: How to Maintain the Right Conditions
A mini greenhouse changes the environment around a plant, so it requires regular observation. Once covered, the growing medium may lose water more slowly than it would in open air.
Provide bright, indirect light
Place the enclosure near a bright window without strong direct sunlight. If natural light is limited, a suitable grow light may help, provided it is positioned according to the manufacturer’s recommendations.
Watch for signs of overheating, such as limp leaves, unusually warm air inside the enclosure, or rapid wilting despite moist growing medium. Move the setup to a cooler location if necessary.
Avoid watering by habit
Check the growing medium before adding water. It should remain moist according to the plant’s needs, not saturated. Because the cover reduces evaporation, watering may be less frequent than for an uncovered pot.
Drainage holes are still important. If water pools in the tray or container, remove it rather than allowing the pot to stand in it.
Vent the enclosure regularly
Open the cover daily to exchange air and inspect the plants. The required amount of ventilation varies with the plant, room temperature, humidity, and enclosure design.
A light mist on the inside of the cover can be normal. However, heavy condensation that drips continuously onto the foliage, mold growth, or a persistently soggy medium suggests that you should increase ventilation and reassess watering.
Do not use condensation alone as a measure of success. A healthy cutting needs suitable moisture, oxygen around its roots, and enough light to support growth.
Common Mistakes to Avoid
A homemade mini greenhouse is simple, but a few mistakes can undermine its usefulness.
- Leaving it in direct sun: The enclosure can overheat and damage delicate tissue.
- Keeping the cover sealed indefinitely: Stagnant, excessively moist conditions can favor fungal problems.
- Overwatering before covering: Water trapped in the medium may remain there for too long.
- Letting plastic touch the leaves: Constant contact can damage foliage and keep it wet.
- Ignoring the plant’s species: Succulents and other plants adapted to drier conditions may not benefit from prolonged high humidity.
- Keeping seedlings covered after emergence: Many seedlings need better airflow once they sprout.
- Assuming new leaves mean roots have formed: Some cuttings produce new growth using stored resources before developing a strong root system.
If mold appears, remove affected plant material where practical, increase airflow, and reduce excess moisture. If the stem becomes soft or dark at its base, inspect the cutting and growing medium; the affected material may no longer be viable.
When and How to Remove the Cover
A mini greenhouse is usually a temporary tool. Keeping a plant enclosed after it no longer needs elevated humidity can make the transition to normal indoor conditions more difficult.
For cuttings, look for evidence of root development. Depending on the container, roots may be visible through the drainage holes or along the sides of a transparent pot. Sustained new growth can be encouraging, but it does not always confirm that roots are established.
For seedlings, remove the cover soon after germination, following the needs of the species. Leaving young seedlings in a closed, humid enclosure for too long can increase the risk of damping-off disease.
Gradually acclimate rooted cuttings
Once a cutting has established roots, introduce it to normal room humidity gradually:
- Open the cover for a longer period each day.
- Observe whether the leaves remain firm during these uncovered periods.
- Increase ventilation progressively rather than removing the cover abruptly if the cutting is still sensitive.
- Remove the cover completely when the plant tolerates the change without persistent wilting.
The transition may take several days or longer, depending on the plant and its growing conditions. If the leaves wilt significantly, slow the transition and check the moisture in the medium.
Frequently Asked Questions
Does a mini greenhouse need holes?
Not every design needs permanent holes, but it does need a way to exchange air. You can open the lid or bag periodically, leave a small gap, or use a container with adjustable vents. The right approach depends on the plant and how quickly moisture builds up.
Can I use a plastic bottle for all seedlings?
A bottle can work for one small seedling or cutting if it provides enough space and ventilation. It becomes unsuitable when the plant grows too large, the enclosure overheats, or the species needs drier conditions.
How long should plants stay inside a mini greenhouse?
There is no fixed duration. Seeds may need a cover only until germination, while some cuttings benefit from higher humidity until they establish roots. Base the decision on the plant’s development and response rather than a universal number of days.
A Simple Enclosure, Used at the Right Time
A homemade mini greenhouse can be an affordable way to help delicate cuttings and certain seeds maintain moisture during early development. Choose a transparent container that fits the plant, keep the growing medium appropriately moist, provide indirect light, and check ventilation every day.
Most importantly, treat the cover as a temporary aid rather than a substitute for suitable plant care. Observe the plant, respond to signs of excess moisture or heat, and gradually introduce it to normal conditions as it becomes established.